Anyhow... I wish I had it.
Monday, October 19, 2009
A Perfect Fall Outfit
Anyhow... I wish I had it.
Sunday, October 18, 2009
Autumn Harvest Party

Saturday, October 17, 2009
Wish List
With my birthday just before the holidays, it is a perfect time to get all my holiday hostessing needs taken care of!
2) And of course, you want to smell nice when you look nice? I loved "Daisy" by Marc Jacobs when I tested it out at the Nordstrom perfume counter.
3) Another dress from Boden!
4) An adorable Vintage inspired Christmas apron, again, from Heavenly Hostess!
Just a little list to start with. wink wink
Saturday, October 10, 2009
A Sneak Peek!
Wednesday, October 7, 2009
Announcing my first Giveaway winner!
So, using http://www.random.org/ I randomly picked between 1-13 (4 comments + 9 followers) and came up with #5 Sarah Brown!
Please go check out Sarah's wonderful blog, Brown Paper Packages tied up with String. If you like giveaways she has lots of them! Currently she has a really neat artwork giveaway, as well as DIY project giveaway! Ahem... maybe I shouldn't have opened my mouth, that means more competition and more difficult odds for ME to win!
Thanks to all who participated, and Sarah, be sure to email me soon (allmylittleinspirations@hotmail.com), so I can get your magazine to you ASAP! I hope you enjoy it, and please be sure to show us if you find something within it that inspires you too!
Monday, October 5, 2009
My Very Own Magnetic Bulletin Board
Using a hot glue gun, I affixed the fabric to the piece of sheet metal. I then criss-crossed the velvet ribbon over the top, attaching when the ribbons crossed. *Note: I ran out of the velvet ribbon and had to go to three stores to find more. Really? Sheesh. Also, I think I would measure better next time. It just doesn't look as polished to me... but a good first try regardless.
Thursday, October 1, 2009
An "Inspirations" Giveaway!
 Imagine my surprise this week when I received another copy in the mail! Now I have two, and really... as much as I love Halloween magazines, I do not need two. So I now hope to make my over-abundance your Halloween inspiration!
So here it is folks! This is the time of year ghouls and goblins all come out of the shadows, so time for any mysterious blog lurkers to come out of the dark as well... otherwise, Corinne, my faithful reader... you're a shoe-in for my first ever blog giveaway!
There are two ways to enter (and if you do both, your name goes in twice!) Here is what you need to do:
1. Leave a comment no later than Tuesday, October 6th at midnight.
2. Become a follower of "All my little inspirations" by Tuesday, October 6th at midnight (anyone already a "follower" will automatically be entered! Yay!
I will select at random and announce the winner Wednesday. You should have your brand new "Celebrate Halloween" magazine in the mail in a week!
Good Luck!
Wednesday, September 30, 2009
Fall has arrived!
Earlier this week, some anonymous soul left a small women's catalog on a co-workers desk. I casually picked it up... and never gave it back. I am in love. I could buy oh too many items from this British based company, Boden. With the chill in the air, I am naturally drawn to the coat and jacket collections. How can a girl choose?
 1. The Rainbow Coat caught my eye first. With all it's colors, it would go with just about everything!
2. The Effortless Velvet Coat comes in 6 fabulous colors! I can pciture wearing this to all my holiday parties!
3. I don't need this Jazzy Trenchcoat but my love of gingham makes it hard to resist
4. Truth be told.... I already have a jacket nearly the exact same as this Marylebone Coat, but mine is black and white and this one is green! They also have it in navy with fabulous red buttons!
5. The Uptown Coat. So simple, so perfect.
6. The British Tweed Coat? Doesn't everyone need an aqua jacket? What else would you wear with your red scarf? To make matters worse.... they have it in a stunning plaid too.
Monday, September 28, 2009
Gooseberry Patch


My most reliable, and most oft used cookbooks (because, let's face it... sometimes we are tempted to buy cookbooks that we will never, ever actually cook from!) are those from the "Gooseberry Patch". At nearly every dinner party and holiday, you can bet that at least one dish will be made from one of the many gooseberry patch cookbooks I own.
Why? Because they are no-frills, fuss-free and just plain old, good down home style cookin'. The added perk, nearly all of them come with other ideas for decorating, gift giving, crafting and celebrating.

This weekend, I made a wonderful Sunday brunch... with nearly everything coming from, or at least inspired by, a recipe from one of these wonderful cookbooks.
I think the favorite was "Oven-Baked Maple Pancakes" from the "Merry Christmas" book. The syrup was almost like carmel, and drizzled over the top, it was divine!
Oven-Baked Maple Pancakes
No need for syrup... it's baked right in!
3/4 cup of brown sugar, packed and divided
1/2 cup of butter
1/2 cup maple syrup
1 1/2 cup biscuit baking mix
1 teaspoon cinnamon
1 cup milk
2 eggs
Heat 1/2 cup of brown sugar, butter and syrup in a small saucepan over low heat; stir until melted. (I actually skipped the step of melting in a saucepan, and just used soft butter, then spreading the mixture in the bottom of the pan...worked great, and one less pan to clean!) Pour syrup mixture into a lightly greased 13' x 9'' baking pan. Combine remaining ingredients and beat with a whisk or fork until well blended; pour over syrup mixture. Bake at 350 degrees for 30 to 35 minutes or until top springs back when touched in the center. Cut into squares; invert onto a serving plate and serve immediately.
Serves 6-8
Wednesday, September 23, 2009
A New Cake Stand

Now. If you are somebody who typically receives a plate or tin or basket of Christmas goodies from me... don't be too surprised if this is what it is delivered on this year. I can't wait to go "plate hunting" for the makings of my perfect cake stand gifts. I think the biggest challenge will be figuring out what adhesive to use.
Saturday, September 19, 2009
Sunflower Soiree


A party is not a party if there are not fabulous favors to take home. That's my theory. Many years ago... when I turned 18 years old, and had a love of sunflowers, my creative aunt made a super cute sunflower cookie. Her's was as big as a plate and I remember loving it. So, what's a girl to do when throwing a sunflower themed party? Well call her dear auntie at 10pm asking if she remembers how she made it! Thanks for your help Aunt Rolayne!
So here is what we could remember, and how I attempted to re-create that beloved sunflower cookie (some trial and error involved, for sure).
- I used a heart cookie cutter to cut out the "petals" and a wide glass to cut out large circles. I cooked them separately (learned that after baking them together first, didn't work)
- Yellow icing and sanding sugar on the petals first ...allow it to set and dry well
- Chocolate icing on the circle centers
- Gently lay the heart "petals" around the chocolate circles, the icing acting as a "glue"
- Scatter mini Chocolate Chips over the chocolate icing while still wet

Before the rain and chill arrives, I wanted one last evening on my lovely back deck, and it was an especially nice and warm evening. We turned on the globe lights (courtesy of Target, and oh the lighting they create is P.E.R.F.E.C.T) and had all the food on a table with a huge bouquet of sunflowers. I picked up a dozen at my local farmers market for $9. They were huge, and I had enough for two very large bouquets.

Now sharing the tasty blue cheese dressing recipe. Because, I am not a huge fan of blue cheese dressing normally... but this one changed my mind.
- 4oz Roquefort, or another good crumbly blue cheese
- 1 cup good mayonnaise
- 1/3 cup heavy cream
- 2 tsp tarragon wine vinegar
- 1 tsp salt
- 1/2 tsp fresh ground pepper
Thursday, September 10, 2009
Feeling Seasonally Conflicted
 Then, to my sheer delight... this arrived in my mailbox. The whole issue is Halloween related. All of it. I have never seen such a thing. Typically, and I know this from having subscribed to Country Living Magazine for years, they only have some of the issue focused on Halloween items... never all of it?! Heaven.
 Last weekend, this Martha Stewart Halloween Magazine almost made it into my basket. But hubby was with me... so I was strong. For both of us. But I confess to you dear readers, I don't know how much longer I can hold off. I feel myself weakening even while typing this.
  So, there you have it. I am conflicted between two loves. It is a love triangle, if you will. Truth be told... I love all seasons, and this is just something I have to work through at the end of every season and the beginning of every new one. Well... except the transition from winter to spring. Usually... I am glad to see those little tulips pop their heads out and the cold to subside... but, well, that is another blog, isn't it?
 Sunday, September 6, 2009
Party-rific!
In the meantime, I went to my most favorite place, the Library, to find some free inspiration. Here is what I left with (You can see a few pages of all of these at Amazon as well!):
1. Essentially Lilly, A Guide to Colorful Holidays by Lilly Pulitzer and Jay Mulvaney:
By designer Lilly Pulitzer, this book was mostly personal accounts a various holidays and celebrations in Lilly's life. While the bright colors and illustrations were fun, for the most part I will take away a couple new recipes.

2. Nell Hill's Entertaining in Style by Mary Carol Garrity:
This book was not nearly as food focused (and let's face it, I have a million cookbooks...so more recipes are not what I need!). This book included much more about the decor of the table and home for various themed (and seasonal) parties.
 3. The Part Planner by David Tutera:
I think this book balanced the aspects of party throwing quite well, David included fun recipes to suit the party theme, as well as examples of fun party decor and for each party he also includes a list of tips to use. My favorite part of this book however, is seeing a cheesy photo of himself on every other page.
 4. Shabby Chic: Sumptuous Settings & Other Lovely Things by Rachel Ashwell:
How I adore all things Rachel Ashwell...always have. This book provides some very budget friendly ideas for not just party decor, but home decor as well. I have a new appreciation for plain old "Nit" dye's because of this book.
 5. Styling for Entertaining by Susie Coelho:
The main focus of this book is upon re-configuring your existing homes decor to create a more party-like atmosphere. I really like seeing the before and after photos. The only downfall is... my home is not nearly as "plain" as the before photos, so I don't know how well the ideas would work for me. There are some nice recipes in this book as well. Like David, Susie also enjoys super cheesy pictures of herself scattered throughout her book.

All in all, some pretty good books... especially for free! Thank you King County Library System. I think I will see what I can get on an inter-library loan, not just those found at my own local library.
Now, I need to stop reading about parties... and start planning some!
Sunday, August 30, 2009
Sugar and Spice! A Babyshower
 Sorry for my summer hiatus! I was so excited to be the hostess to my friend's recent baby shower and had to share! I had been seeing some lovely ideas for a "Sugar and Spice" theme on both Kara's Party Ideas as well as Kara's inspiration "ModernEve"... and used the ideas to create my own. I fashioned the invitations from scrapbook paper I found, and went with a bright pink and tangerine color combination. The invitations turned out adorable!
Decor: I had a lot of fun creating this "Sugar and Spice" banner that displayed over the buffet. Also displayed on the buffet is the afternoon's "menu", something I have noticed done by catering company's. Of course, mine was completely in theme! I used Photoshop and"Shabby Princess" papers from the "Blossom" Collection. Everything was perfectly coordinated (I couldn't allow anything less!) I found lots of cute fuchsia and orange ribbons (I am a ribbon junkie!) and of course, fresh flowers abound. I also had an assortment of Izze's Sparkling Juices... in coordinating shades of orange, pink and deep red!
 Food and Favors: I was originally going to use shakers full of cinnamon sugar as the invitations for the shower... but that later transformed into party favors. I ordered them about 1 1/2 weeks in advance from fooddirect.com.... and I received an email the day before the Saturday shower, Friday, that they would arrive on Monday. Nice. I had to scramble... quickly finding some itty bitty personal sized shakers at a kitchen store nearby my house. Not quite what I had in mind, but it worked.
 Games: We had a lot of fun with the games. Along with the invitation I also included a little insert on the same scrapbook paper announcing the mother-to-be's registry information as well as "Pampers for Prizes". For every pack of diapers brought, they were entered in a raffle for a gift certificate. She ended up with enough diapers to last her months! We also played this Baby Shower guessing game that I saw here. We had B-Barrettes/Bows, A-Applesauce, B-Bib, Y-Yellow Rubber Duck, S-Socks, H-Hat, O-Onesie, W-Washcloth, E-Electric Outlet Plugs, R-Rattle. Some of them were really stumped! I was afraid it would be too easy, however we did end up with two winners...we had to ask the secret tie-breaking question, "How many times did mommy-to-be have to get up last night for a bathroom visit?"
I loved the little trivia idea that "Modern Eve" did at her Sugar and Spice Party, so I made one of my own. It was pretty funny and I tried to make some of the answers a little bit silly for fun.
 At my best friend's baby shower years ago I made up a madlib, this time I found one pre-made here. It ended up pretty darned funny, and I made sure to print it on pretty paper for the baby-book.
All in all, I think it was a success! My dear hubby helped me so much! Our entire SUV was filled to the brim with items I had to transport. I can't wait until the next excuse for a party!
Sunday, July 26, 2009
PIE!
I found this delicious and easy recipe on the blog Huckleberry Prairie. It is a blueberry cherry pie... and one pie was NOT enough for our large queue. Note to self....make twice as much as next year!
Blueberry Cherry Pie
Crust ingredients needed:
1 1/2 cup flour
1 tsp sugar
1 tsp salt
3 tbsp milk
2/3 cup vegetable oil
Mix together until ball of dough forms. Pat out into pan. Make additional crust for pie top.
I cheated and used ready-made pie crust! Shhhhh.....
Pie Filling:
1/2 cup sugar2 tbsp cornstarch
1/4 tsp cinnamon
1 can (21 oz) cherry pie filling
1 1/2 cup frozen blueberries
Mix sugar, cornstarch and cinnamon.Add cherry pie filling and blueberries. Mix.Pour into prepared crust.Roll out second crust on floured wax paper.Cut out star shapes with small star cookie cutter.
Egg white mixture:
1 egg white
1 tsp of water
2 tsp sugar
Mix egg white and water. Brush on stars and sprinkle with sugar.
Cover pie crust edges with foil and bake in preheated oven at 425 degrees for 35 minutes WITHOUT star crust top.
After 35 minutes, remove foil edges and add stars in any pattern you desire.
Bake for an additional 15 minutes or until stars and crust are golden brown.
 The next Pie was made for a very pregnant co-worker who craves banana flavored foods... not bananas! For this reason, I had to make some slight modifications to the recipe. Link to the original recipe listed below. This time I wised up and made TWO! It received rave reviews, several declaring it the best banana cream pie they have every had. It came to me courtesy of Country Living Magazine (May 2009 issue).
Banana Pudding Pie
The original recipe can be found here.
Here were my modifications:
Crust:
2 c Vanilla wafers, crushed
2 Tbsp dark brown sugar
2 Tbsp sugar
1/4 tsp salt
5 Tbsp butter, melted
1/4 tsp vanilla extract
Preheat oven to 350 degrees. Mix all ingredients together and press mixture into a 9-inch pie plate. Bake for 10 minutes. Cool completely on a wire rack.
Filling:
1 Large box Instant Banana Pudding, prepared according to box directions
1 cup fresh whipped cream
5 Tbsp of Caramel Sauce/ice cream topping, plus extra for garnish
2-3 Bananas, sliced
Gently fold whip cream into prepared and cooled banana pudding, set aside. Layer sliced bananas over cooled crust. Drizzle the caramel over the bananas and top with pudding mixture. Chill for 2 hours, or overnight. Decorate with remaining banana slices and caramel (and maybe some chopped pecans!).
Saturday, July 4, 2009
The 4th of July

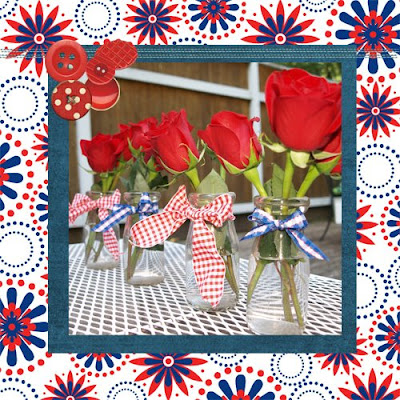
Happy Fourth of July! We have had a great one so far! We have the rare treat of high temperatures and clear skies for this glorious 3 day weekend. I am trying to relax and enjoy as much of it as I can. We had friends over last night, and excuse to make some onion straws to top burgers...they have been demanded for all future gatherings to follow! I found some perfectly red, white and blue ribbons for some roses in my little antique milk jars. I wanted to mix some little flags in with the roses, but ran out of time to hunt some down! Next year, maybe.
I also was able to finally use my newly hung homemade chalkboard! It is looking a little bare on our kitchen wall, but no fear... I have some ideas for friends to keep him company. Just a matter of time...


