Monday, February 22, 2010

A Giraffe Party!

I was so lucky to have my first "paying" party planning job just a couple of weeks ago, and I am pretty proud of the way it turned out! Our good friend's daughter just turned 6, and I was asked to put together a party for her. Ellette is quite the little girl... not nearly as interested in pink, fairies and ballet as other 6 year old girls, but far more interested in creatures of all sizes: insects, dinosaurs, penguins...and giraffe's. This is what we settled on for the theme of her party.

I found that it was very difficult to find giraffe items on their own... most everything "party" related came in a jungle theme with the giraffe playing second fiddle to the lion and the monkey. I wanted to keep this party as true to the giraffe theme as possible... and once I started looking, I started to find much more. It did take much more creativity however! The added challenge... everyone seems to have a very different idea of what colors a giraffe is!? Some giraffes were yellow and brown, some were tan and brown, some were yellow and orange! Ack! All these colors made it hard to stick with one color theme, so the only cohesive tie was the giraffe theme itself. Maybe I need to get over my matchy-matchy color obsession?

Anyhow, I hope you find some ideas, or at least some enjoyment in the details:

The Birthday Girl: Did I mention this was a "surprise" party? Made the whole thing even more fun! I found the cute little felt giraffe cap at Michael's for $3!


Invitations: Found the yellow and white cards, as well as the giraffe stamp and brown ink at "Impress"


The Decor: We had tons of black, gold and yellow balloons all over! I hung several yellow, and brown and white tissue paper "poofs"  amid the balloons. I used a "cricut" to cut out a sweet Happy Birthday banner from yellow and white papers that I found at my local scrapbooking store. Originally, I planned to buy a couple little rosemary topiaries and position some wooden giraffe's to appear as though they were eating from the little "tree"... but the topiary cost $20...and I was on a budget! So instead... I saw a flat of wheat grass for $2.50 in my grocer's produce section, and plugged it into some small  terra cotta pots and, viola, giraffe's on the grassy plains! I found a few cute little wooden giraffe's to place around the party, including a little giraffe clip to hold the menu cards.

Games and Activities: There were several activities for the kids: a wooden giraffe puzzle and markers for them to color and take home, some cute paper bag puppets to make, and "Pin the Tail on the Giraffe".
The Favors: I am having lots of fun with sugar cookie decorating... and this party would be no exception. I found a giraffe cookie cutter at "Cookies" and decorated with royal icing. Instead of spending hours on the details, I applied wet royal icing brown spots to the wet yellow base and I was very pleased with the way it turned out. I was a little afraid it would not look like a giraffe... but I think it worked out well! This was a pretty small party, so only a few "goodie" bags for the kids. They included some candy, giraffe stickers and a little giraffe toy (that expands and grows in water!)


The Food: We had a great dinner of spaghetti and meatballs, garlic cheese bread (recipe courtesy of Pioneer Woman!), and appetizers of a veggie tray and cheese dip and crackers... but of course, none of that matter's to the kids (right?) All that really matters to the kids is BIRTHDAY CAKE! So, I found this fun Wilton "Animal Crackers" pan that can be made into all different kinds of animals, including of course, a giraffe!
 

I had a lot of fun, and I was very honored to have been asked to help in planning this party. I am up for more, anyone interested?! :) In the meantime... I am trying to resist the temptation to throw together a quickie spring party, just to enter the current contest going on a Maddycakes Muses, but oh boy, does it look like I would have some stiff competition. Maybe next year?

Sunday, February 21, 2010

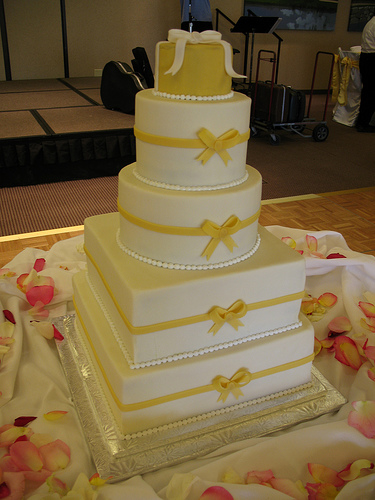
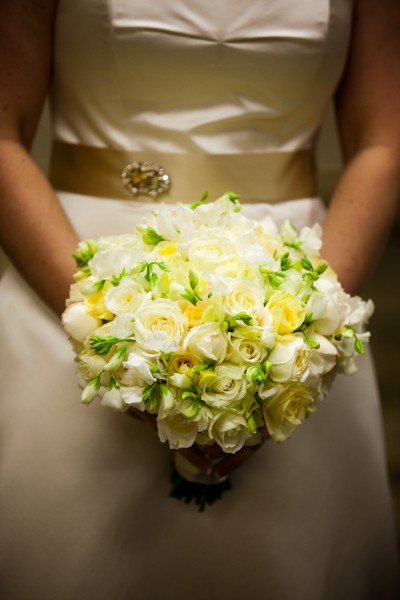
Yellow and White Wedding: Four Variations on a theme

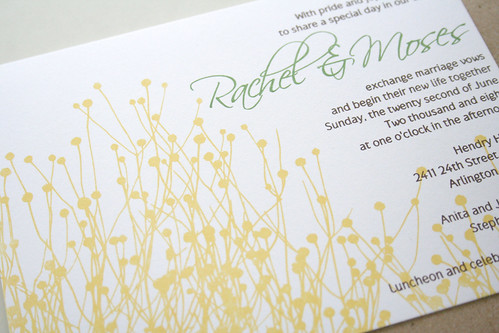
As I mentioned in my post below, my father will be married soon, and I am lucky enough to have the opportunity to help (remotely at least...). So, I have come up with four "inspiration boards" on the yellow and white theme.

I tried as best as I could to link the photos (and give credit where credit was due), however... I have spent a lot of time pouring over photos, so I may not have been able to capture all of them. Please accept my apologies if I did not give proper credit for the photos displayed here.

Wedding  #1: A Classic Yellow and White Wedding
I envision this wedding to be very simple, primarily white with a soft and subtle sprinkling of pale yellow's.


Wedding #2: Country Chic
Truth be told, I think this is my favorite yellow and white wedding concept. I think it mostly comes from my love of gingham (which I would spatter around... not overboard of course!) I also love it's casual feeling, which is most appropriate for this informal springtime wedding.

Bouquet ; Boutonniere; Invitations; Sunny Bouquet; Felt Cuff Bouquet, Casual Table Settings; Gingham Centerpieces

Wedding #3: Modern Wedding
Now that I have compiled all these photos... I am not sure "modern" is the right way to describe this wedding? Well... judge for yourself!


Ring CakeInvitations, Centerpieces, Bouquet, Boutonniere

Wedding #4: "Wildcard" Navy Blue and Yellow Wedding
In my wild search for photos, I continued to come across a combination of Navy Blue and Yellow, and fell in love with it. So, I am including it as well... because I think it is amazingly fresh, while easily balancing both an elegance while remaining casual.
Table Settings, Casual Table Setting, Invitations, Bridesmaids Dresses

Photo Credits: She and He Plan Weddings

Tuesday, January 12, 2010

Wedding Cakes!

As of only a few hours ago, I have officially begun Wilton Cake Decorating Course 3! This is THE class... the biggun! In this class we will lead up to our final challenge... a  tiered wedding cake! Woopee!

For Christmas, Santa gave me one of my most favorite gifts:


I love this book! The only thing that I find tricky... all the cake recipes are scaled to make giant cakes!? I tried to cut the recipe in half. I do NOT recommend this! It just did not work out. So, I need to do some practice. I learned that my father will be married in April, so... of course, I have offered to make a cake. I have a few months to get some practice in beforehand.
Wish me luck!

Monday, January 11, 2010

"Blast Off" A Rocket Party

After a few very hectic months... I have been able to return to my "inspirations" and I hope I can find the time to update this lil' ol' blog again, and more often!


I could not allow a birthday to pass without doing something to celebrate. It's simply not in my nature. (Although, I did temper it just a bit...I will save the big stuff for later)
So, after several conversation's like this -
Me: What kind of birthday party do you want?
Quincy: *Silence*

Me: Do you want a Lightening McQueen Party, or a Monster Truck Party, or a John Deere Party?
Quincy: YES!
I sorta gave up... and did what I wanted to do, which was a Rocket Party. I am sure in the years to come, he will have a very definite idea of what type of party he wants to have. So, for now, mommy had her fun!

Rocket Themed decor:

Conveniently, we have tons of Rocket Stuff already because Quincy's bedroom is Retro-Rocket themed. I just strategically placed a few items from his room around the party area. I strung up some silvery stars from the ceiling (also, conveniently left over Christmas decorations I just didn't pack away) and hung some rockets (that will later be launched... a HIGHLY anticipated event for ALL the Williams' family men) to look like they were flying around space. Quincy helped me decorate by tossing some silver star confetti all over the kitchen island. He did great with it... although, eventually gave up on "scattering" them and left a substantial pile of stars on the table. I think we will be finding stars in the oddest places for weeks.

 
Do you know that very little "Rocket" themed party supplies exist? Why are mother's everywhere forced into throwing horribly boring, cartoon character parties. Not for me, no sireee.
I did however, find these adorable Straws, and that was the extent of it.


Rocket Themed Games:

Ok, This is where my party may have fallen short, but there were only 4 kids, and I just didn't get too creative with the games. I found some crayola space stickers that they could color, which actually did keep them quiet and entertained for about 10 minutes (which is like eternity). The put the stickers up on some poster board paper with a big moon on it. We then used this poster board to play "Pin the Rocket on the Moon". I realized that "Pin the Tail on the Donkey" is the worlds most versatile game. It can be re-created into just about ANYTHING! It was fun... and amused the kids for another 10 minutes.
Some of the "big" kids got into it too.


Rocket Themed Food:
The best part of a themed party for me, is coming up with creative foods to fit the theme. For this party, it was mostly coming up with fun names for everyday foods. Here was the menu:
Star Dippers and Caramel Sauce = Apples cut into star shapes (at least that was the idea) with dip
Intergalactic Veggies = Veggie Platter
Moon Mac n' Cheese = Um... Mac n' Cheese
Cosmic Chili = Pioneer Woman's Chili!
Space Spuds = Baked Potatoes w/ all the fixin's
Alien Goo Sundaes = Blue Jello Cups
Tang! Of Course!
 Had I been really adventurous, I had planned to make corn dogs and stick them into floral foam or something similar to prop them up as "Rocket Dogs"... but, not for this party. Life goes on... we hope.


And the best part of a kids birthday party?
THE CAKE!
There are so many Rocket Cakes out there... but this was one I found that I thought was cute and do-able:

Find the tutorial here (Theirs is a little bit prettier... please don't judge me too harshly).


Rocket Party Favors:
Ok, These were what I spent most of my weekend working on. It was fun, and something I had long wanted to do... but, man, it was time consuming!
First you make the cookies... then the black outlines... then let them dry overnight.
Then, fill in the blue... let it dry 5-6 hours. Then, fill in the red... let it dry 5-6 Then write the "Q". Allow the entire cookie to dry at least 24 hours before placing into cellophane baggies. Phew. Add cute little "Rocket" Thank You Tags, and VIOLA! Done!

Fleets of Rockets drying before "launch"


I really liked the sugar cookie recipe I found here. But... royal icing is just not tasty. Pretty, but not tasty (and it was even a Martha recipe!). Any one have a better one?

So, there you have it.  During November and December I really had to stop with all the parties because I was so busy at work... what a bummer, that's the best time of year for parties, too. Now, I am hoping that I can get back in the swing of things, and have fun again! :)

Monday, October 19, 2009

A Perfect Fall Outfit

I saw this jacket in my newest issue of Country Living Magazine. I have been pining for it for three days now. I can't stop thinking of it, and in my mind I have already created a perfect fall outfit using it in my head.The perfect outfit to go on a hike through a quiet wood enjoying the fall colors. Or maybe the perfect outfit to go to the Pumpkin Patch. Or maybe the perfect outfit to go pick apples from a local orchard. Or maybe the perfect outfit just to wander around the city doing some early Christmas shopping.

Anyhow... I wish I had it.

Jacket: Fred Flare
Jeans: Any ol' pair that feels good, really
Hat: Sweet little knit cap off Etsy
Wellies: Apple Print! Adorable! From Ebay

Sunday, October 18, 2009

Autumn Harvest Party


How lucky am I to have a hubby with such photography talent?

Last week I left you with the teaser, tonight I am fulfilling my promise!

It started with this invite:


The Decor: I showed up early to my sister-in-law's lovely farm to help her get the place spruced up a bit. I had made the banner the day before to hang on the porch. We gussied up the front door and porch (a perfect farm porch by the way!) and got the dining room all ready for dinner after a visit to the pumpkin patch:


Favors and Goodies: The day before I made mini pumpkin bread loaves (courtesy of Martha Stewart "Baking Handbook" cookbook) for everyone to take home as a favor, and some "goodie bags" for the kids. The goodie bags had some pumpkin candies, pumpkin patch Pop Rocks, Halloween Fruit Snacks and an Orange "Izze" soda, all tied up with a Pumpkin Patch Ribbon.  I also created some awards to present to each child to go along with their goodie bags. Awards like : Biggest Pumpkin, Quickest Pumpkin Picker, Littlest Pumpkin, Most Perfectly Round Pumpkin, etc


The Food: After all the fun at the pumpkin patch, and running around the corn maze, we had homemade applesauce doughnuts and hot mulled apple cider! Yum! I found the recipe on the "Farm Chicks" blog, and they turned out great! We packed it all up in a perfectly autumnal picnic basket belonging to my sister in law. Dinner was just as delish... I created a potato soup from a hodgepodge of recipes and everyone topped the soup off with bacon bits, cheese and chives. To go with the Soup was a sausage and cheese biscuit recipe that was such a hit that I must share it with you! See recipe below. Salad was an easy mix of greens, dried cranberries, candied pecans and pear with a poppy-seed dressing.


I couldn't resist this "Pumpkins in the Field" recipe when I saw it. It was too perfect to pass up considering the occasion. Another recipe I will share. And to make it even better? These adorable polka-dot cupcake liners from "Confectionery House" (fear not... I ordered them in every color)!


Recipes to share:
Pumpkins in the field (from "Ghoulish Goodies" by Sharon Bowers)
1 cup butterscotch morsels  
2 cups chow mien noodles
1 cup dry-roasted, salted peanuts
24 candy pumpkins (I used Brach's Mellow-creme Pumpkins)

- Line baking sheets with wax paper (or drop them into cupcake liners like I did)
- Put butterscotch morsels in a bowl, and melt them in microwave: Heat on high for 60 seconds, then stir well. Microwave and stir in 10 second bursts until just melted through.... don't overheat!
- Stir in the chow mien noodles and peanuts and drop mixture by heaping tablespoons onto prepared baking sheets.  While the haystacks are still warm, place a pumpkin on the top. Refrigerate to cool and harden. Store in an airtight container in the fridge for up to 1 week.

Simple Sausage Ring (from Taste of Home)
1 lb pork sausage (I used Jimmy Dean's Sage variety)
2 tubs (12 oz each) refrigerated biscuits
2 cups shredded cheese (Mine was a cheddar and jack cheese mix)

- In a large skillet, cook sausage until no longer pink; drain and set aside
- Flatten each biscuit to a 3-in diameter. Press half of the biscuits onto the bottom and 2 inches up the sides of a greased 10 inch fluted tube pan. Spoon sausage over the dough; sprinkle with cheese. Top with remaining biscuits.
- Bake at 350 degrees for 20-25 minutes or until golden brown. Let stand for 10 minutes before inverting onto a serving plate and slicing.

Saturday, October 17, 2009

Wish List

***Greedy Alert***
It is exactly 1 month from my birthday. I have always liked that my birthday and Christmas come so close together, because I really only have to make one "wish list" for both. Whatever still remains on my list after my birthday moves over to my Christmas List. Hubby has been asking, so I happily have obliged by providing him my Birthday/Christmas wish list. Maybe you will find something here to add to your list as well?

With my birthday just before the holidays, it is a perfect time to get all my holiday hostessing needs taken care of!

1) A perfect Thanksgiving day apron from Heavenly Hostess. Really, I love almost all the aprons found on this website! You just can't go wrong!
2) I have already blogged about the fabulous jackets found at Boden... but they have amazing dresses and skirts as well!
3) I have so many lovely platters for Thanksgiving, but I have realized that so many things I bake are in a plain old Pyrex casserole dish! Solution: These beautiful pewter casserole holders from Holland Boone Home... just place your casserole in this for instant beauty and presentation!
4) One of my favorite bloggers, Pioneer Woman,  has just come out with a cookbook with her most deliciously tasty recipes! Yummy


1) Doesn't every girl want to dazzle at all the Christmas parties? How about Diamonds by the Yard at Tiffany & Co? I have been eyeing this beauty for at least a year now.
2) And of course, you want to smell nice when you look nice? I loved "Daisy" by Marc Jacobs when I tested it out at the Nordstrom perfume counter.
3) Another dress from Boden!
4) An adorable Vintage inspired Christmas apron, again, from Heavenly Hostess!

Just a little list to start with.  wink wink

Saturday, October 10, 2009

A Sneak Peek!

Been busy, busy today preparing for tomorrow's "Fall Harvest" celebration! All the details to come quite soon!

But in the meantime... Take a Peek at the official invitation!


Invitation Ingredients
Orange Gingham Scrapbooking paper = Bo Bunny and Pink Paisley Papers
Pumpkin = Big Bazzill Brad in Apricot + green ribbon

Wednesday, October 7, 2009

Announcing my first Giveaway winner!


I must say, I really liked doing a giveaway. It felt like a very small scale Oprah "My Favorite Things" episode! I also got to see some your blogs too! Fun Stuff! Fear not readers... this shall not be my last giveaway, so stay tuned.... and considering the amount of applicants I would say your chances for a win are MIGHTY good!

So, using http://www.random.org/ I randomly picked between 1-13 (4 comments + 9 followers) and came up with #5 Sarah Brown!

Please go check out Sarah's wonderful blog, Brown Paper Packages tied up with String. If you like giveaways she has lots of them! Currently she has a really neat artwork giveaway, as well as DIY project giveaway! Ahem... maybe I shouldn't have opened my mouth, that means more competition and more difficult odds for ME to win!

Thanks to all who participated, and Sarah, be sure to email me soon (allmylittleinspirations@hotmail.com), so I can get your magazine to you ASAP! I hope you enjoy it, and please be sure to show us if you find something within it that inspires you too!

Monday, October 5, 2009

My Very Own Magnetic Bulletin Board


I do adore Ballard Designs and when I received a recent catalog I immediately loved these magnetic bulletin boards.  As I looked at them I thought ... I can make that! So, with a few modifications, that is what my weekend was this past weekend and I am pleased with the end result. Mine ended up a bit more... ornate (nobody ever accused me of being a simple girl)


First off, I started with a 12x18 piece of sheet metal from my neighborhood hardware store (approx $7). These pieces of sheet metal come in various "thicknesses", I made sure to pick one on the slightly sturdier side. I had some black and white toile already (free! after I have owned it for more than a year I count it as free! heehee) that patched my black and white bedroom perfectly, and I picked up some velvet ribbon to add as an accent ($3). The more expensive and surprisingly difficult item to find was a 12x18 sized frame ($30). I was hoping to find a more decorative, but you will see how I jazzed it up in my own way.

Using a hot glue gun, I affixed the fabric to the piece of sheet metal. I then criss-crossed the velvet ribbon over the top, attaching when the ribbons crossed. *Note: I ran out of the velvet ribbon and had to go to three stores to find more. Really? Sheesh. Also, I think I would measure better next time. It just doesn't look as polished to me... but a good first try regardless.

The end product.... still maybe just a little bit too plain for my taste, and certainly, plain old refrigerator magnets simply wouldn't do. The magnets on this bulletin board need to be special. Another visit to my craft shop and I found these fun crystal and silver items in the jewelry making aisle, as well as some fun vintage-y medallions ($9) I used them to create some magnets, as well as a pretty little bow on the top corner of the frame.


So now, for roughly the same amount of money, I have a beautiful 12x18 magnetic board to coordinate perfectly in my bedroom, on the wall over my reading corner. I can easily hang pictures, magazine articles, wish lists and of course... inspirations.


Note: There is still time to enter for my Halloween giveaway! See post below...

Thursday, October 1, 2009

An "Inspirations" Giveaway!

About 4 weeks ago I had happened upon a magazine, "Celebrate" by Phyllis Hoffman, while waiting to check out at my local Michael's craft store. It was the fall edition, and I loved it. I immediately subscribed to the quarterly publication. I wasn't sure when the subscription would kick in, so when I saw the "Celebrate" Halloween edition a couple weeks ago I couldn't resist... see my blog entry on 9/10/09, it's a problem. This Halloween focused magazine has fabulous articles featuring Matthew Mead and Amy Atlas, along with loads of creative decorating and cooking ideas. Imagine my surprise this week when I received another copy in the mail! Now I have two, and really... as much as I love Halloween magazines, I do not need two. So I now hope to make my over-abundance your Halloween inspiration!


So here it is folks! This is the time of year ghouls and goblins all come out of the shadows, so time for any mysterious blog lurkers to come out of the dark as well... otherwise, Corinne, my faithful reader... you're a shoe-in for my first ever blog giveaway!

There are two ways to enter (and if you do both, your name goes in twice!) Here is what you need to do:

1. Leave a comment no later than Tuesday, October 6th at midnight.
2. Become a follower of "All my little inspirations" by Tuesday, October 6th at midnight (anyone already a "follower" will automatically be entered! Yay!

I will select at random and announce the winner Wednesday. You should have your brand new "Celebrate Halloween" magazine in the mail in a week!

Good Luck!

Wednesday, September 30, 2009

Fall has arrived!

The air has a definite crispness that has announced to me "fall has arrived" and along with it comes my overwhelming urge to want to purchase lots and lots of new fall coats! Since I moved to the Pacific Northwest from San Diego nearly 10 years ago, one of the things I continue to adore is the actual change of seasons that occurs here... and the excuse to change my wardrobe along with it! I was delighted to wear my coats then, and I continue to love my fashionable coats still today! My collection has grown, but that has not stopped my from wanting to add to it.


Earlier this week, some anonymous soul left a small women's catalog on a co-workers desk. I casually picked it up... and never gave it back. I am in love. I could buy oh too many items from this British based company, Boden. With the chill in the air, I am naturally drawn to the coat and jacket collections. How can a girl choose?

1. The Rainbow Coat caught my eye first. With all it's colors, it would go with just about everything!

2. The Effortless Velvet Coat comes in 6 fabulous colors! I can pciture wearing this to all my holiday parties!

3. I don't need this Jazzy Trenchcoat but my love of gingham makes it hard to resist

4. Truth be told.... I already have a jacket nearly the exact same as this Marylebone Coat, but mine is black and white and this one is green! They also have it in navy with fabulous red buttons!

5. The Uptown Coat. So simple, so perfect.

6. The British Tweed Coat? Doesn't everyone need an aqua jacket? What else would you wear with your red scarf? To make matters worse.... they have it in a stunning plaid too.

Monday, September 28, 2009

Gooseberry Patch

I love cookbooks. I read them like other people read novels. I pick them up wherever I can find them... and often times I have to find new and creative places to store them.

My most reliable, and most oft used cookbooks (because, let's face it... sometimes we are tempted to buy cookbooks that we will never, ever actually cook from!) are those from the "Gooseberry Patch". At nearly every dinner party and holiday, you can bet that at least one dish will be made from one of the many gooseberry patch cookbooks I own.

Why? Because they are no-frills, fuss-free and just plain old, good down home style cookin'. The added perk, nearly all of them come with other ideas for decorating, gift giving, crafting and celebrating.


This weekend, I made a wonderful Sunday brunch... with nearly everything coming from, or at least inspired by, a recipe from one of these wonderful cookbooks.


I think the favorite was "Oven-Baked Maple Pancakes" from the "Merry Christmas" book. The syrup was almost like carmel, and drizzled over the top, it was divine!

Oven-Baked Maple Pancakes

No need for syrup... it's baked right in!

3/4 cup of brown sugar, packed and divided

1/2 cup of butter

1/2 cup maple syrup

1 1/2 cup biscuit baking mix

1 teaspoon cinnamon

1 cup milk

2 eggs

Heat 1/2 cup of brown sugar, butter and syrup in a small saucepan over low heat; stir until melted. (I actually skipped the step of melting in a saucepan, and just used soft butter, then spreading the mixture in the bottom of the pan...worked great, and one less pan to clean!) Pour syrup mixture into a lightly greased 13' x 9'' baking pan. Combine remaining ingredients and beat with a whisk or fork until well blended; pour over syrup mixture. Bake at 350 degrees for 30 to 35 minutes or until top springs back when touched in the center. Cut into squares; invert onto a serving plate and serve immediately.

Serves 6-8


Wednesday, September 23, 2009

A New Cake Stand


I went to the farmer's market on Saturday, as there are only a few more left before we must wait until next year rolls around. While wandering about, I happened to end up in the "craft" section, honest mistake, really. I came across a booth full of lovely little cake stands, all different sizes, heights and types.

Upon further inspection and discussion with the crafter, it turned out that these adorable and wide variety of cake stands are simply plates adhered to a glass candlestick.... some new, some vintage.


Um... stinking cute, and I had cash burning a hole in my pocket... so, after MUCH review, here is what I went home with:


Now. If you are somebody who typically receives a plate or tin or basket of Christmas goodies from me... don't be too surprised if this is what it is delivered on this year. I can't wait to go "plate hunting" for the makings of my perfect cake stand gifts. I think the biggest challenge will be figuring out what adhesive to use.


Now, how in the world can I improve upon this already clever design? Hmmmm... let me think. How, oh how, can I make this cake stand even more perfect? OH! I know!.....

chocolate, caramel, ooey, gooey brownie goodness

Saturday, September 19, 2009

Sunflower Soiree


Mother Nature has graced us with a few very nice, warm late summer days. I decided to take advantage of these last warm days before fall officially debuts and host a small, impromptu dinner party. I had previously been inspired by the Sunflower Soiree featured on "The Party Dress", and threw together my own version. I did it in one day, mostly with items I already had around. If I had spent more time planning in advance, I could have done more, but it still turned out pretty cute.

I confess, I made the invitation after the party. My friends are content with verbal/email invitations, but had I sent invitations this is what they would have looked like...

Outside: simple and elegant, folded and tied with a pretty ribbon


Inside: I sewed a button on a paper flower from my local scrapbooking store to create a sunflower. Black and white gingham paper shows once the flaps of the invitation open. Cute and easy!

A party is not a party if there are not fabulous favors to take home. That's my theory. Many years ago... when I turned 18 years old, and had a love of sunflowers, my creative aunt made a super cute sunflower cookie. Her's was as big as a plate and I remember loving it. So, what's a girl to do when throwing a sunflower themed party? Well call her dear auntie at 10pm asking if she remembers how she made it! Thanks for your help Aunt Rolayne!


So here is what we could remember, and how I attempted to re-create that beloved sunflower cookie (some trial and error involved, for sure).

  • I used a heart cookie cutter to cut out the "petals" and a wide glass to cut out large circles. I cooked them separately (learned that after baking them together first, didn't work)
  • Yellow icing and sanding sugar on the petals first ...allow it to set and dry well
  • Chocolate icing on the circle centers
  • Gently lay the heart "petals" around the chocolate circles, the icing acting as a "glue"
  • Scatter mini Chocolate Chips over the chocolate icing while still wet
I realized that my versions were too big for the cellophane bags I had, so in this case, good ol' saran wrap had to do. Placed all the cookies in a pretty basket for my guests.


Before the rain and chill arrives, I wanted one last evening on my lovely back deck, and it was an especially nice and warm evening. We turned on the globe lights (courtesy of Target, and oh the lighting they create is P.E.R.F.E.C.T) and had all the food on a table with a huge bouquet of sunflowers. I picked up a dozen at my local farmers market for $9. They were huge, and I had enough for two very large bouquets.


The dinner? It disappeared before it could be photographed, but I will try to describe it in juicy detail. We had cheese and crackers and olives as an appetizer, tri-tip roast, baked potatoes with all the fixin's. I picked up some amazing heirloom tomatoes at the same farmers market I purchased the sunflowers at. I found a recipe for homemade blue cheese dressing to drizzle over the tomatoes with some fresh basil. For dessert, a berry cobbler and ice cream. Yummy.

Now sharing the tasty blue cheese dressing recipe. Because, I am not a huge fan of blue cheese dressing normally... but this one changed my mind.
  • 4oz Roquefort, or another good crumbly blue cheese
  • 1 cup good mayonnaise
  • 1/3 cup heavy cream
  • 2 tsp tarragon wine vinegar
  • 1 tsp salt
  • 1/2 tsp fresh ground pepper
Mix in a food processor until combined but still chunky. Easy? Yes! Delicious? Yes!